WooCommerce Integration
Connect your WooCommerce store to automate shipping quotes, generate waybills, and sync tracking.
Setup
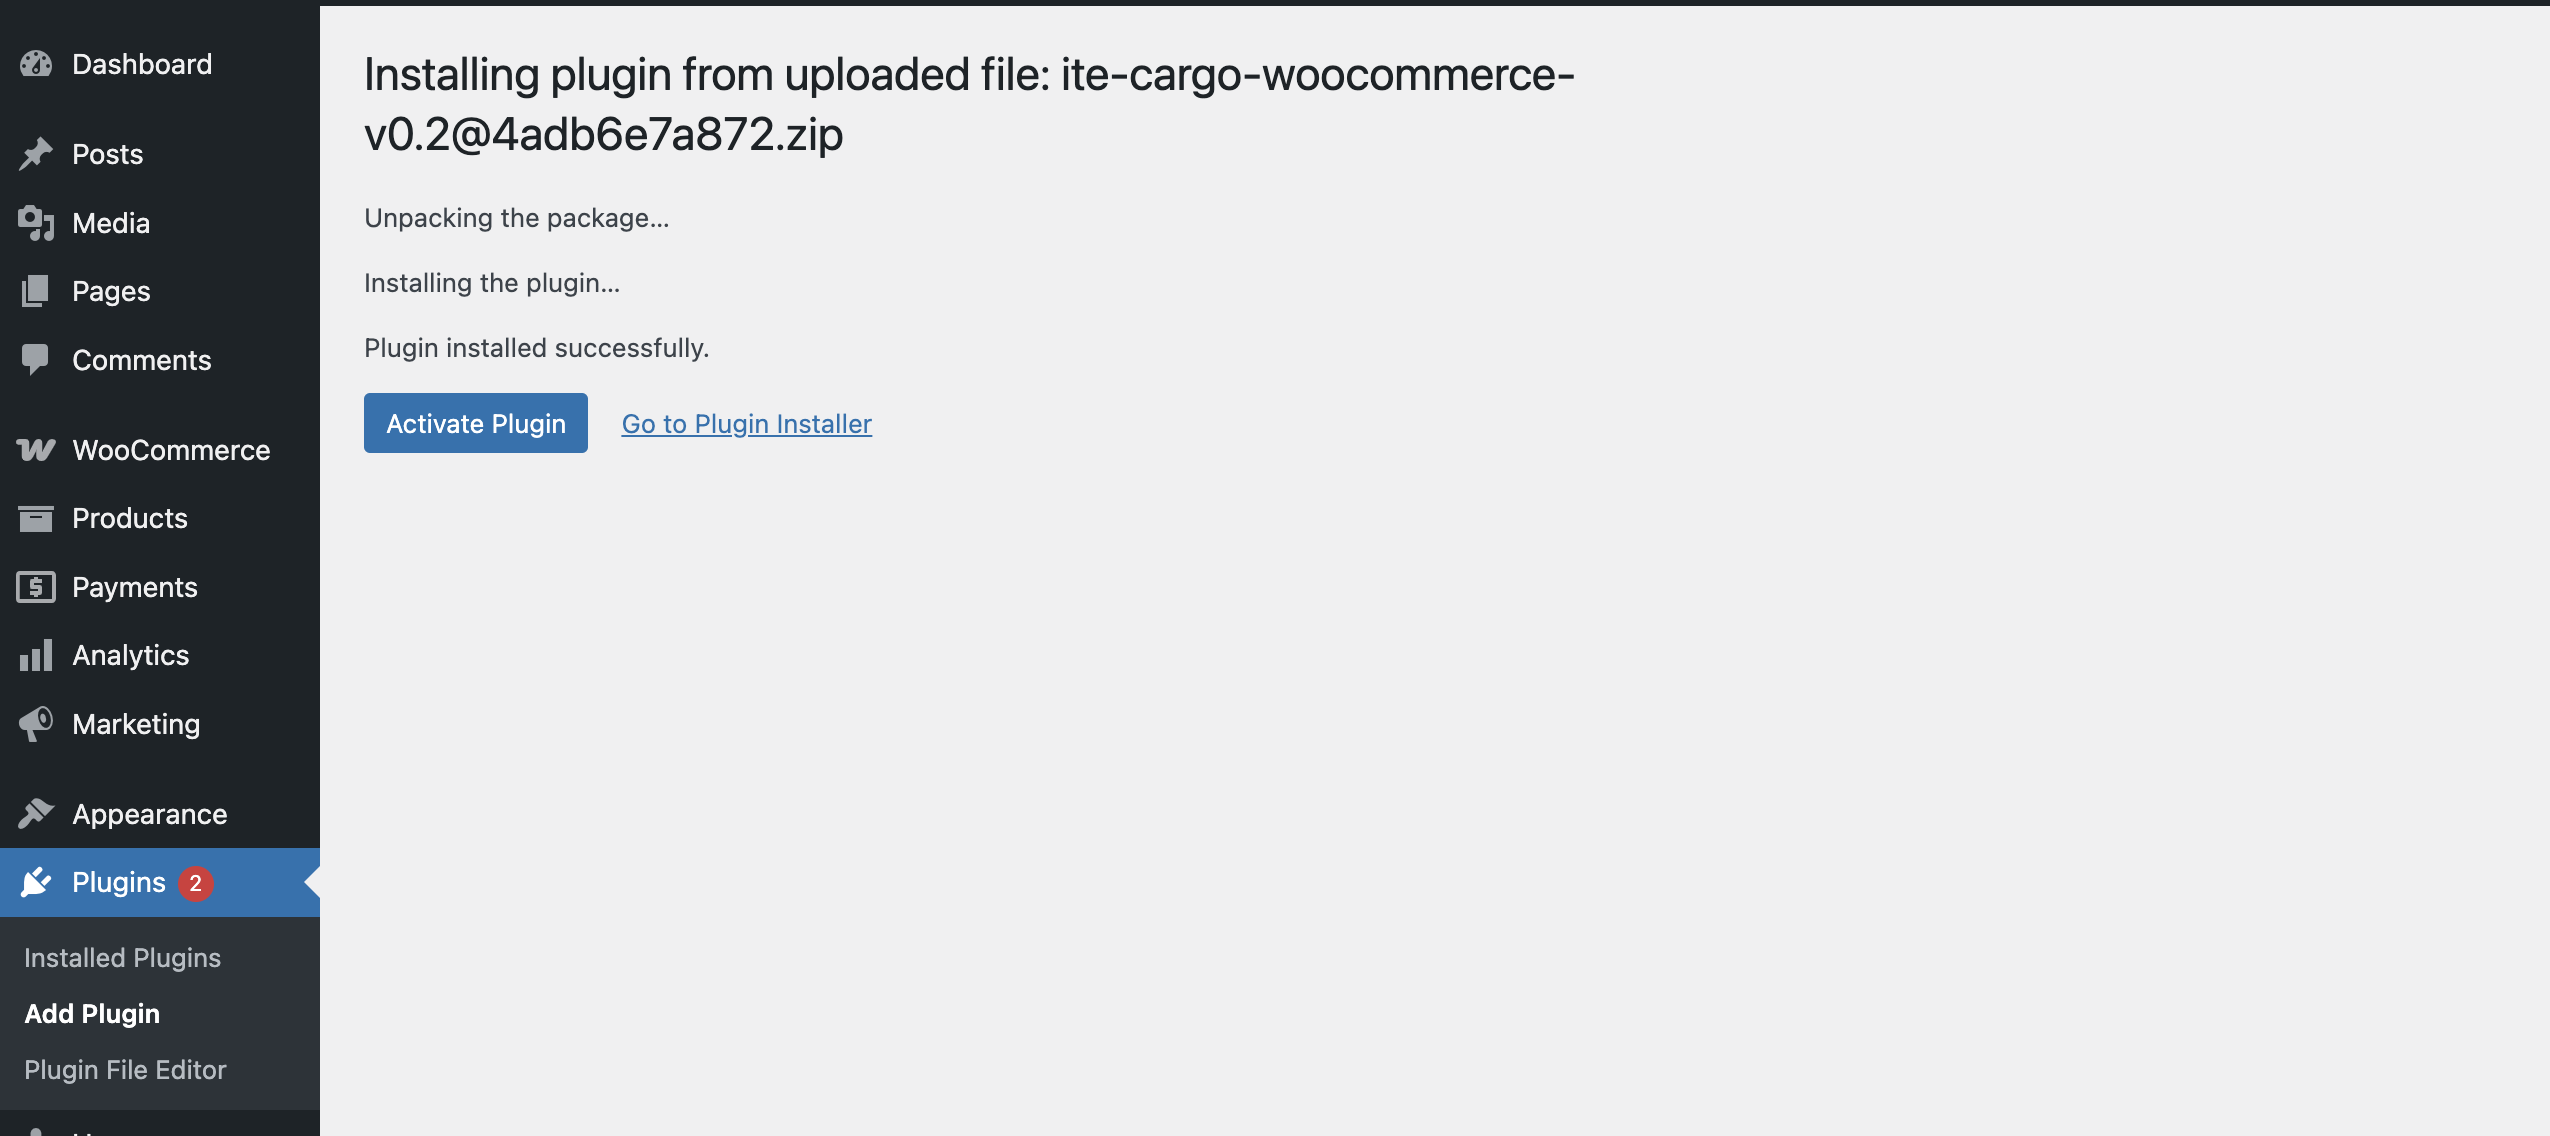
Install the Plugin
After downloading the plugin, go to your Wordpress dashboard → Plugins → Add New → Upload in WordPress and activate the ZIP.
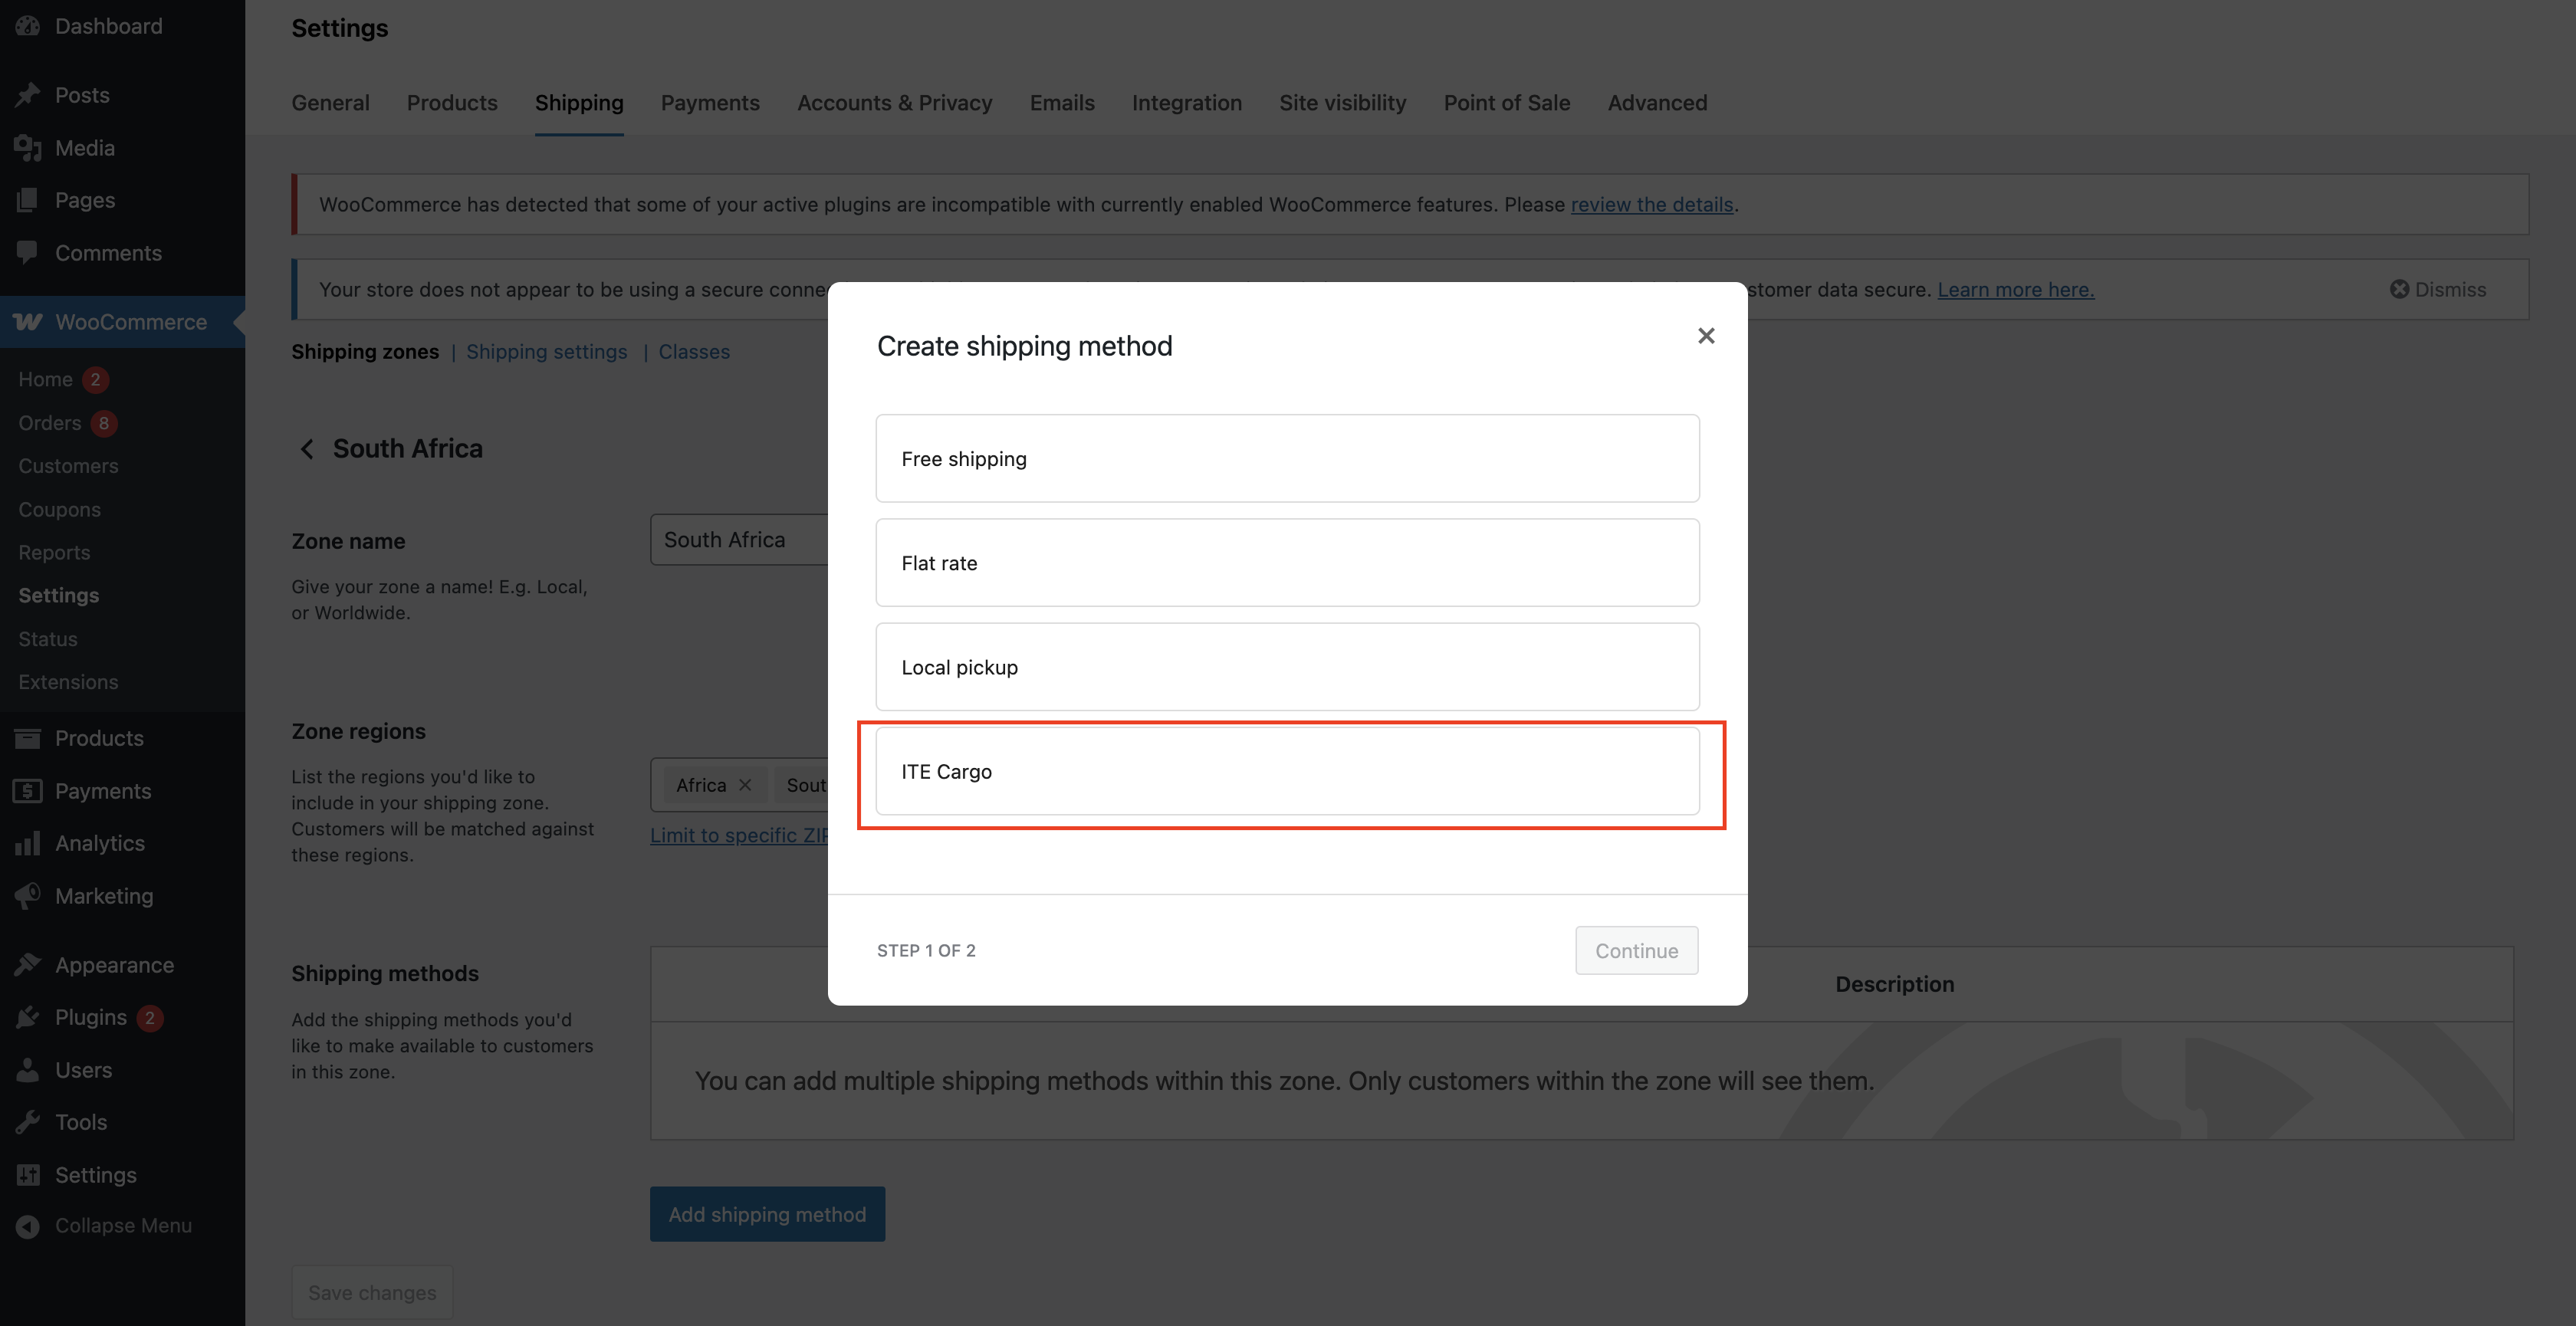
Add to Shipping Zone
Go to WooCommerce → Settings → Shipping → Shipping Zones and add “Logistical Solutionist (Pty) Ltd or ITE Cargo”.
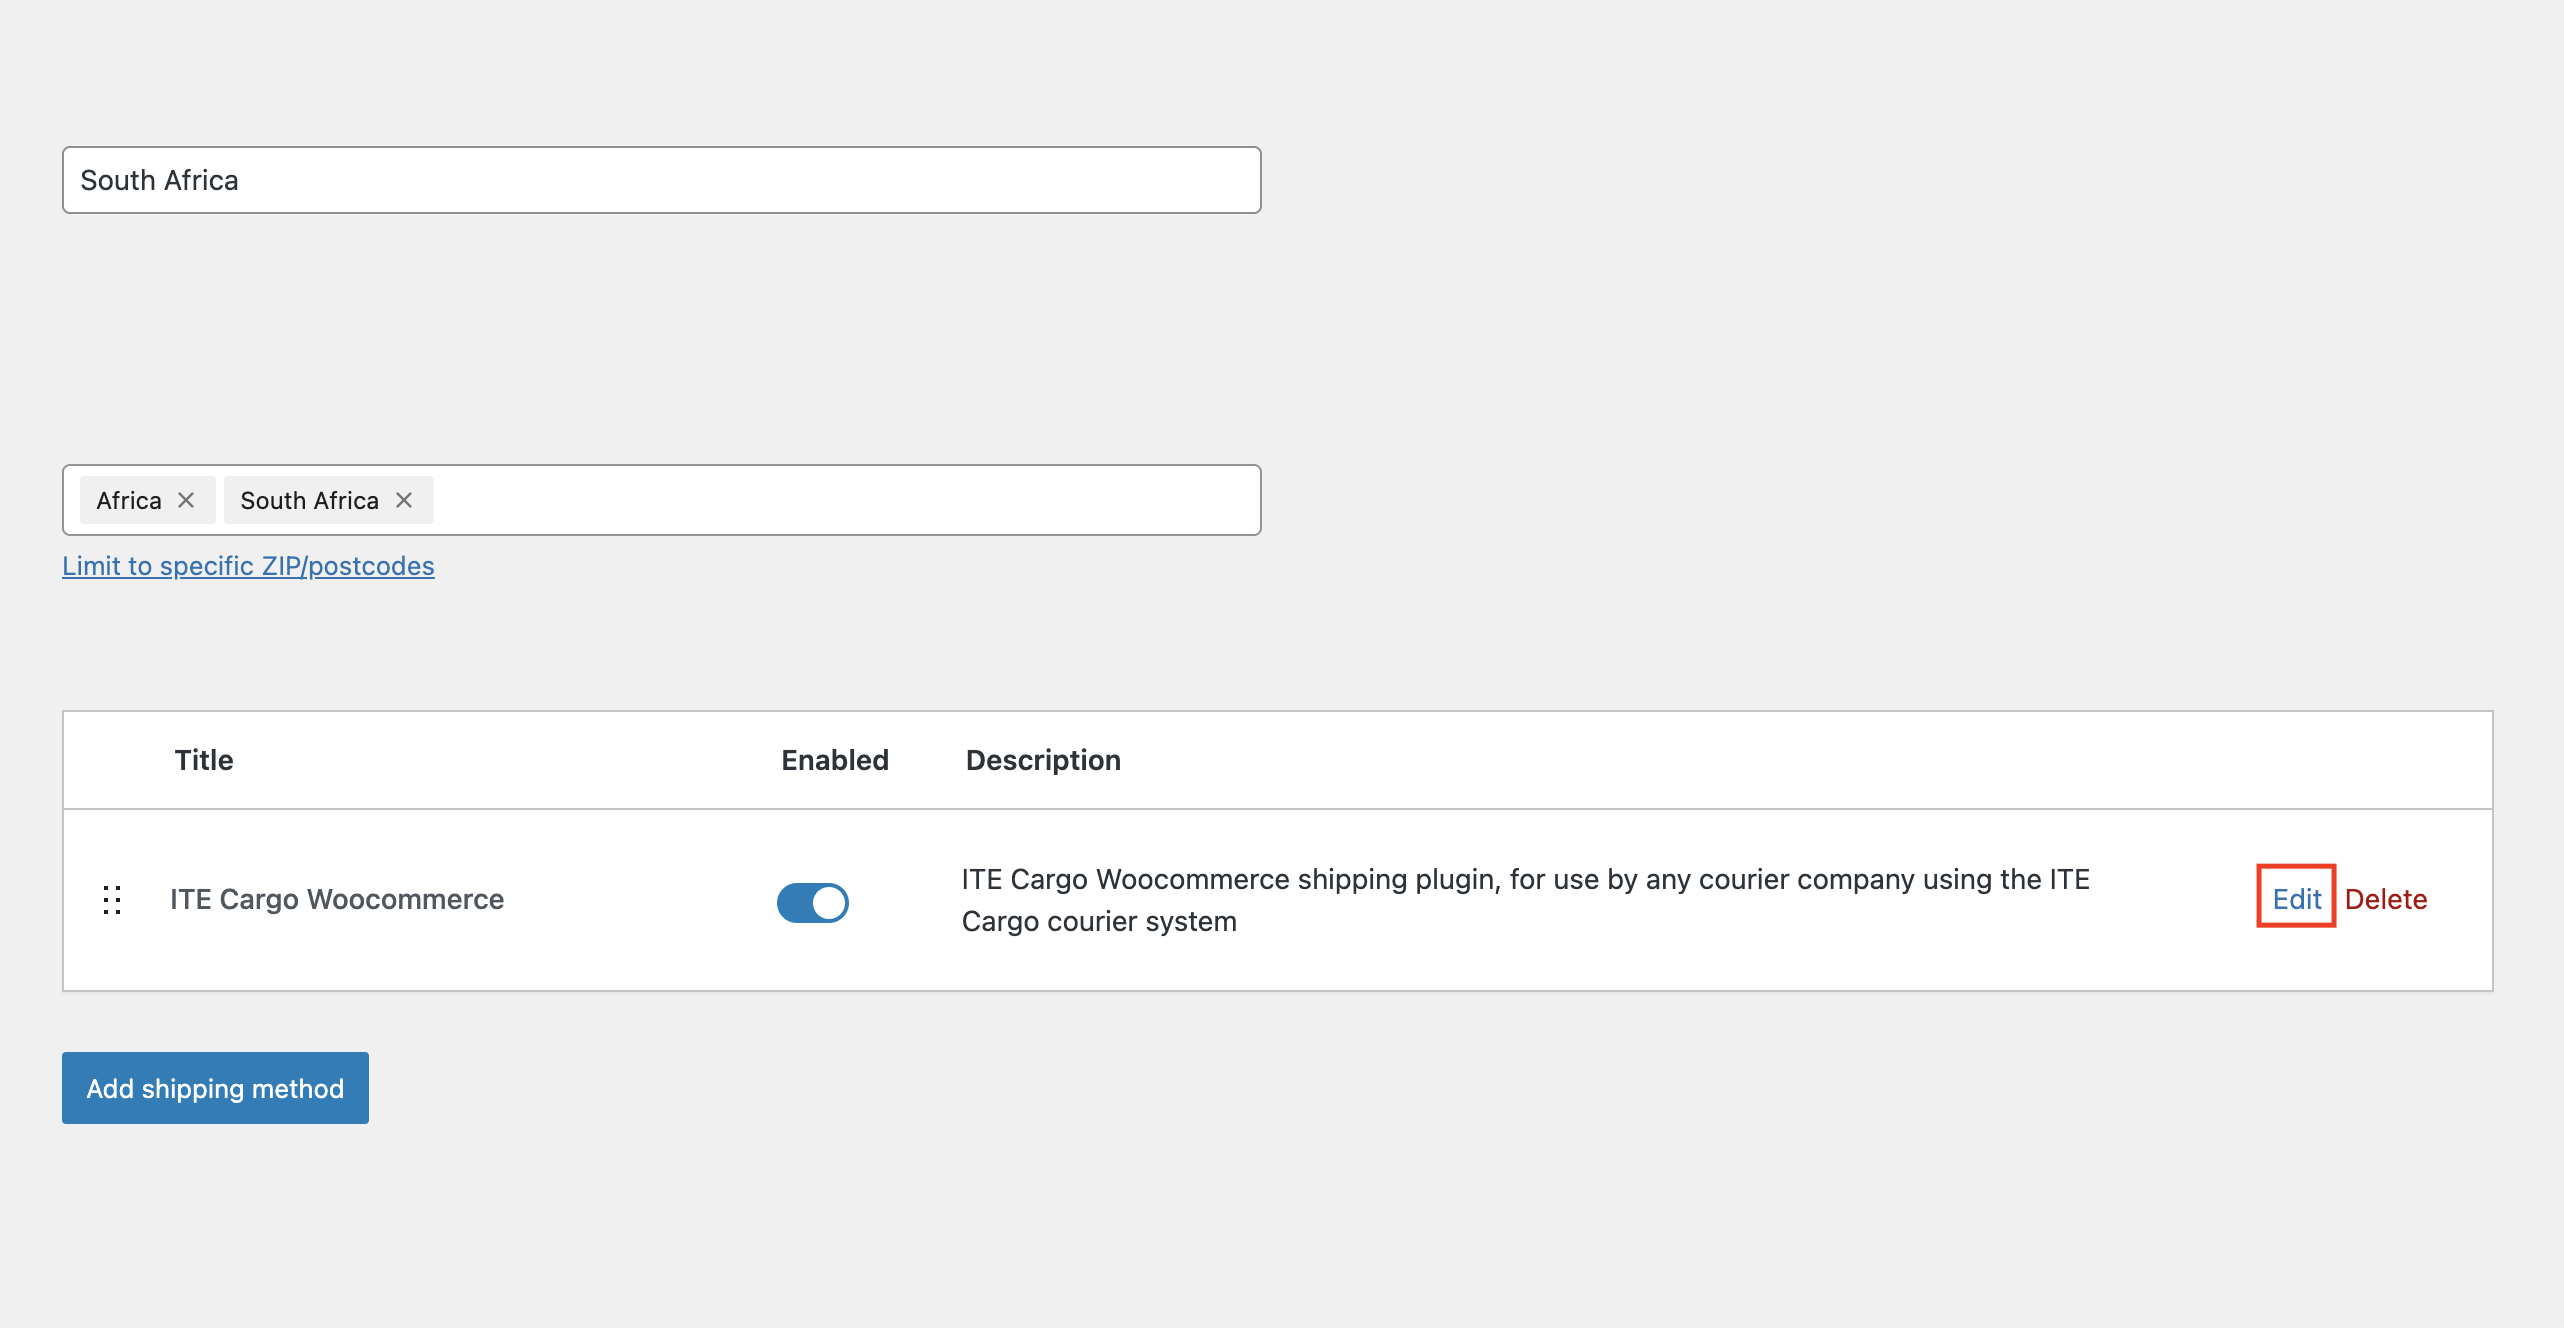
Open Method Settings
Click the blue Edit link next to the method to open its settings page.
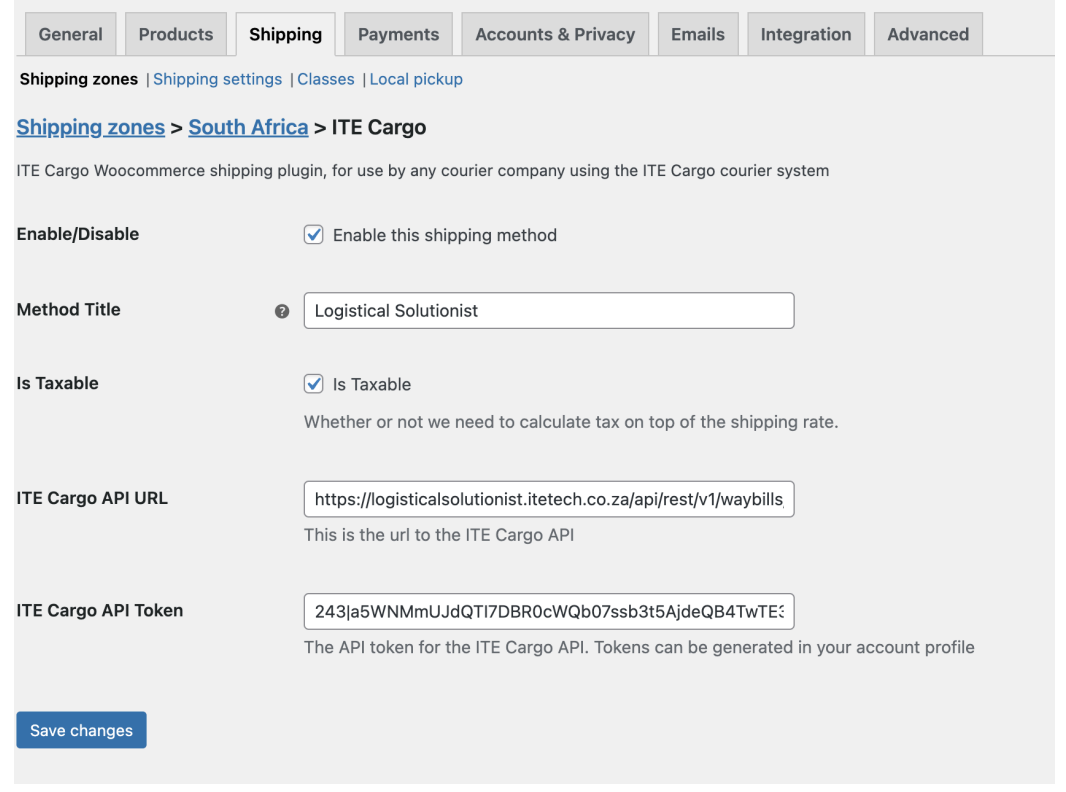
Enter Your Credentials
Set the API Token and API Endpoint to retrieve rates (see screenshot).
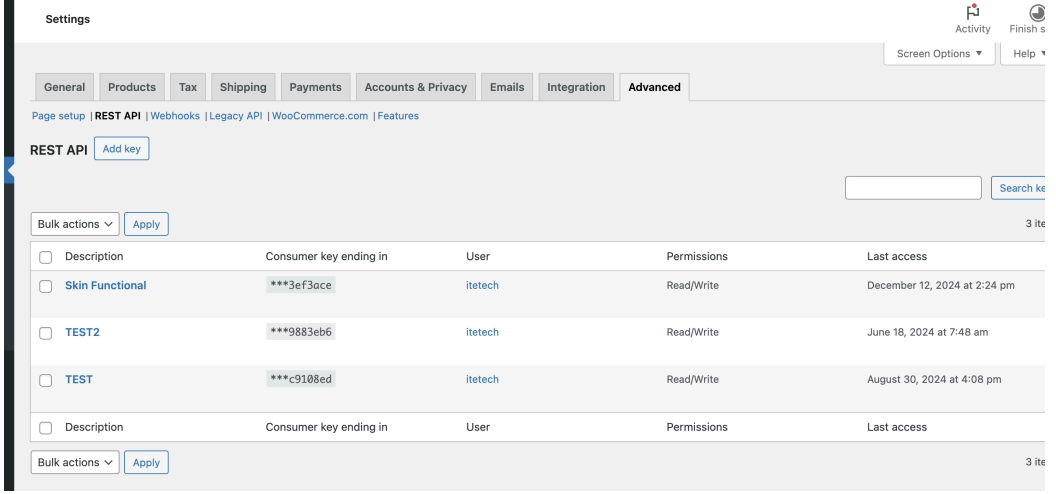
Create a New Token
In the admin go to WooCommerce → Settings → Advanced → REST API, then click Add key. Choose Read/Write permissions, then copy the Consumer Key and Consumer Secret for the Client Portal integration.
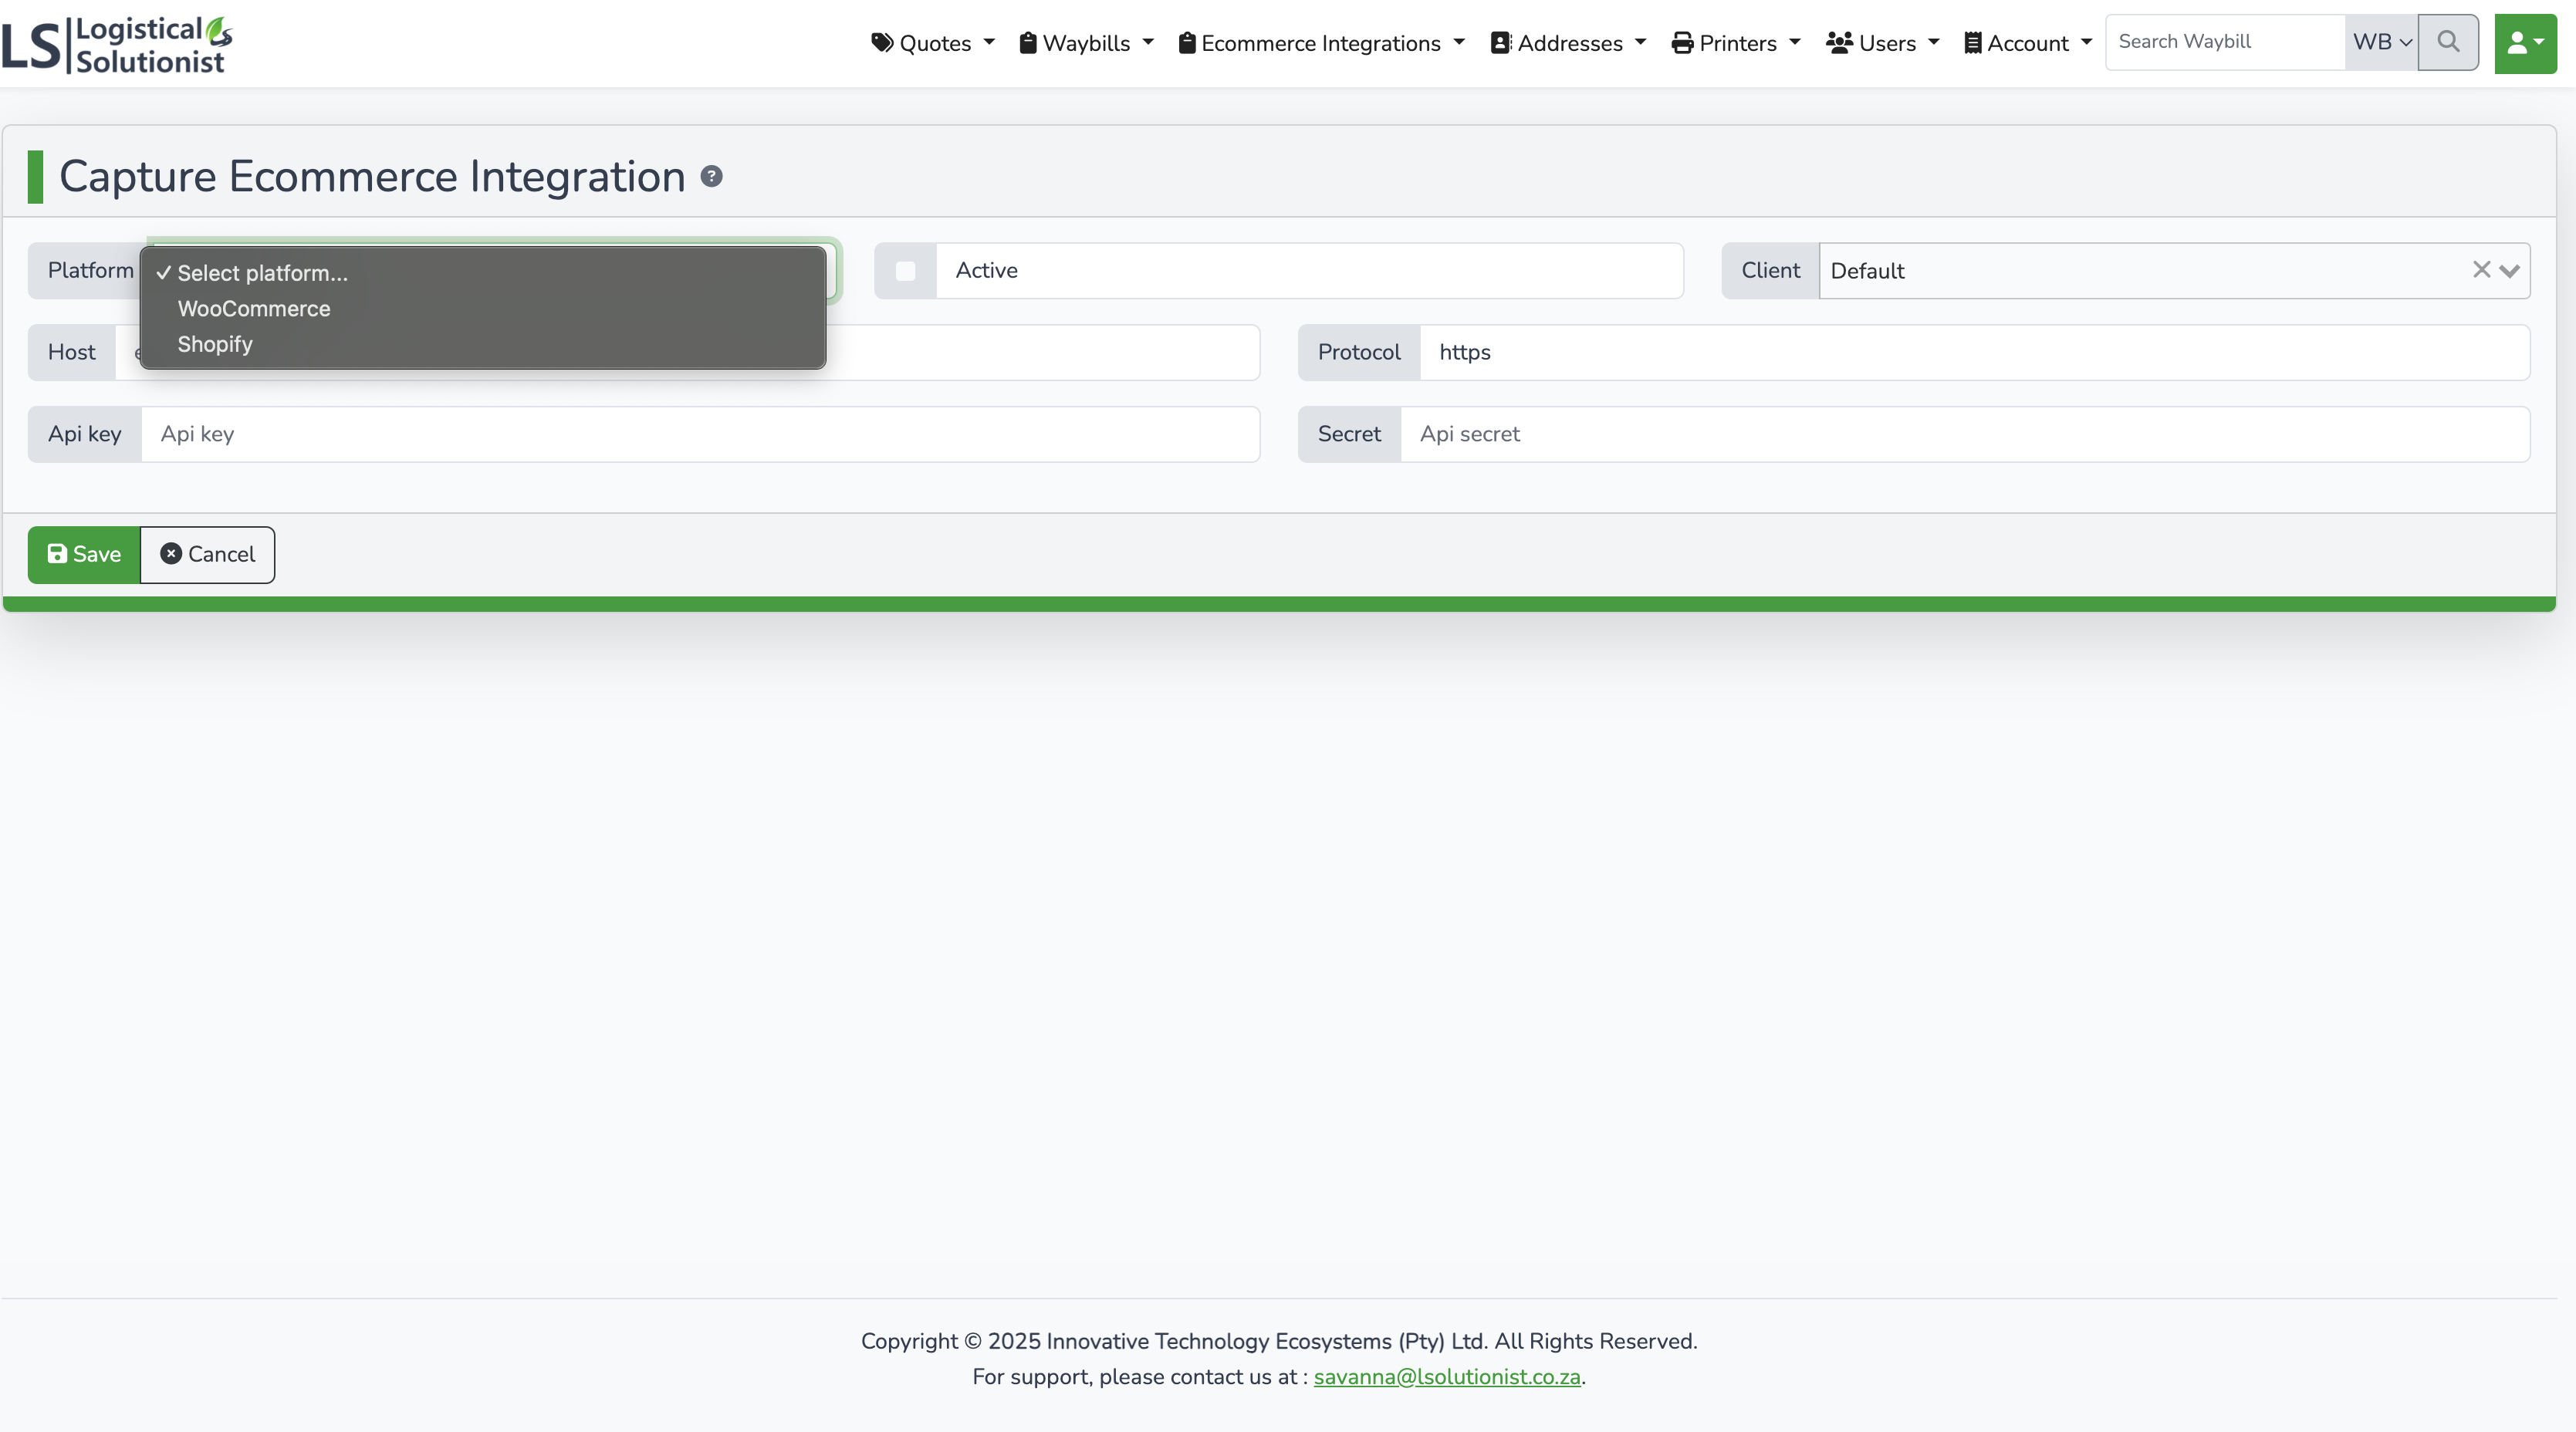
Connect the Client Portal
Log in to the LS Client Portal → eCommerce Integrations → Capture → create your WooCommerce integration and paste the keys to authorise access.
Need help setting it up?
Our team can assist with configuration, testing, and go-live checks.
Talk to Support